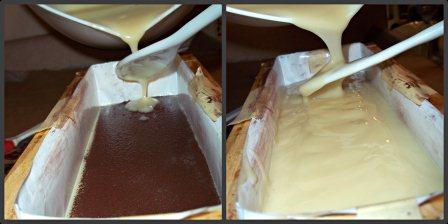
Almost a year and a half ago, I made my first batch of Castile soap. Traditionally, Castile is made with only one oil - olive. Just olive oil, lye, and water. This simple recipe creates a creamy, luxurious bar of soap.
Castile soap benefits from a long cure. Typical soaps are ready to go after about 4-6 weeks, although I think they get better, too, with age. As you can see from this post about my Castile's progress over weeks and months, I wasn't quite sure what to think of it at first. The soap had to sit for quite a while before I started liking it. I wasn't particularly impressed at weeks 6 and 12 - the lather was minimal and slimy. I started to notice a change in the lather around week 18, though. By then, the lather seemed less slippery and a bit more bubbly. After six months, it was even better. And now that the batch is over a year old, it is fantastic. Castile may never have big, fluffy bubbles, but the lather does become creamy and dense over time. (I like to use a mesh shower poof to help kick up a nice lather.)
Swirling mica/oil drizzled on top.
Because Castile requires a very long cure time and I have only a few bars left from the last batch, I figured that I better make more now so it can sit for a while.
I made this batch with a classic olive oil, lye, distilled water, and essential oils of lavender and peppermint. (I have a difficult time leaving things unscented.) And because the soap recipe is so simple, I decided to jazz things up by attempting a technique that I have been wanting to try for a while now - mica oil swirled tops. To make mica oil swirls, mica is mixed with a small amount of oil, drizzled over the soap, and then swirled. The oil saponifies along with the rest of the soap, leaving the shimmery mica swirls behind.
Here is a video I made of the process:
I had some challenges with this batch. As you can see in the video, the soap turned out really soft. Even after sitting for a week, it was like prying room-temperature butter away from the mold. I tore the side of one bar trying to slide the side away, and bits of the soap stuck to the bottom. When I made my first batch of Castile, I used a log mold. The soap was soft when I went to cut it, but I don't remember it being as soft as this new batch was.
Could be a couple of things. First, I probably need to do a much steeper water discount with Castile batches. I usually use full water in my regular recipes, with the water being 38% of the oil weight (which gives me a lye concentration of about 27%). For the Castile, I bumped the water down to 33% of the water weight - which, honestly, isn't much - and I think I need to bump it down even more. My first batch did okay at these ratios, although it was a bit soft initially. I don't know why this batch seemed so much more softer. Maybe it didn't gel in the slab mold? I'm not sure that my first batch of Castile gelled, though. I didn't see either batch gel. (I usually peek after insulating and often catch my soap gelling. It's so cool-looking!) Methinks the water is the problem, though. I've been doing some reading and it seems that a lye concentration that's closer to 40%-50% would be better. Regardless, it should still cure into nice, hard bars, especially since I'm going to let it sit for 6-12 months!
I also wonder if the additional oil for my mica swirls had anything to do with it. Probably not, since I used so little oil to mix the micas. I doubt it was enough to dramatically alter the soap.
Overall, I am happy with how this batch turned out, although I wish that my swirls were prettier. I still need some practice with that. But I do like how the oil/mica mixture worked out, leaving the shimmery mica behind on top. It's such a fun and easy way to dress up bars! The mica swirls can give lots of fun color to a bar, or give some personality to a batch that discolors dark brown due to the fragrance oil.
I'm glad that I have another batch of Castile waiting for me! It will still take some time to get through my last batch. And I've got other soaps besides the Castile to use, too! It's always so fun to go into my soap room and pick out a new bar!
When I was little, Valentine's Day meant classroom parties where we all gave each other cards, made heart-shaped arts and crafts, played games, and ate cupcakes that someone's mom brought in. Everybody was in on the fun and nobody was left out. We were like tiny hippies - peace, love, and candy for everybody! And if your crush was in your class, you got a Valentine from them since everybody gave Valentines to everybody. I remember in fifth grade the guy I liked was in my class and I cherished the Valentine from him, even though everyone else in the classroom probably got the same card. Those were good times. And my mom and dad always got me a box of Valentine's candy, too. I'm talking a Whitman's double-decker or a sampler from the candy/nut shop in the mall. You know, the good stuff.
As I got older, Valentine's Day became increasingly disappointing, as many things do. Once I got to middle school, there were no more classroom parties. No more Valentines from your crush just because he was in your class. No more love for all, all for love. It was suddenly a dog-eat-dog world, and only couples were in on the Valentine's Day fun. Single and want a Valentine's cupcake? You'd better bake it yourself because nobody's momma was gonna show up and give you one. Want a long-stemmed rose or even just a Valentine's card? Better find yourself a boyfriend or girlfriend. Want someone to serenade you? Well, the glee club sold singing telegrams, but chances were good that you weren't going to get one unless you sent one to yourself, which would be very sad.
High school was more of the same. It seemed that the Valentine's Day festivities ended in elementary school.
I quickly became cynical beyond my years, which probably didn't help my chances of getting a singing telegram. I told myself that I didn't care, that the whole Valentine's thing was stupid. That it was a scam, just a corporate gimmick to make people spend money. Although part of me did still wish that what's-his-name would finally come to his senses and give me a stuffed gorilla holding a heart that said "Hot Stuff" on it or something. Thank goodness I could count on my folks for a box of candy. That I did care about.
Once I became an adult and finally found a significant other, I liked Valentine's Day a lot more. Now it means roses, some sweet treats, a nice dinner, and spending time with my sweetie. It means taking to time to reflect on the love you share with someone else, although I think it's good to do that everyday anyway.
Melt-and-pour heart embeds, made with a silicone ice cube tray.
When I started thinking about making a Valentine's Day soap, I thought of roses.I had originally planned to use a Sensuous Black Rose fragrance oil on its own, but then I remembered that I had a bottle of Champagne fragrance oil, too. Why not put them together? After all, roses and champagne go together like soap and water.
And because this is a special soap made with love, I got a little ambitious. It had been a very long time since I had played with melt-and-pour soap (almost two years!), so I decided to make some cute little M&P hearts to embed on the top of my loaf. And then it occurred to be that I could also add a mica line. And then it occurred to me that I could add TWO mica lines! And I would also try to master textured tops, which has been my Achilles heel in cold process soapmaking.
Here is a video of the making of my "Roses & Champagne" Valentine's Day soap:
I started out by making my heart embeds by melting some clear M&P soap base in the microwave. (It's best to chop up the soap into chunks so that it melts faster and more evenly. Also, take care not to scorch the soap - nuke it in short 30-second bursts until just melted.) Bramble Berry's Merlot sparkle mica gave my hearts a perfect deep, shimmery red. I mixed the mica with a bit of rubbing alcohol to break up any clumps and then I added it to my melted soap base. For my mold, I used a cute silicone ice cube tray that I found in the dollar bins at Target. After pouring the soap into the molds, I spritzed it with rubbing alcohol to burst any air bubbles, and then popped the soap into the fridge to set up.
Then I moved on to making my cold process soap. For this batch, I used olive oil, coconut oil, sustainable palm oil, castor oil, and cocoa butter. Because I was planning to put M&P embeds on top of my soap, I wanted to avoid gel phase. During gel phase, the soap heats up and becomes gelatinous as it saponifies. I was afraid that that kind of heat could melt my M&P hearts, so I decided to avoid gel phase for this particular batch. I kept my temps cool, partly to keep the soap from heating up too quickly and partly because I was using a new floral fragrance oil and wanted to avoid any acceleration issues. (Florals are notorious for accelerating and seizing. I am happy to report that the rose fragrance oil did very well. I used only half of what I normally would have, since I mixed it with equal parts Champagne FO, and I did use full water. The soap traced quickly, but never became unmanageable. I brought it to a medium-thick trace and it remained very workable for the entire soaping session.) I usually soap around 100-110 degrees Fahrenheit, but I let my oils and lye cool to about 90 degrees this time.
I added my fragrance oil combination to my cooled oils along with some sodium lactate (1 Tbsp for 32 oz. oils) and titanium dioxide. The sodium lactate helps create a harder bar, and the titanium dioxide whitens the soap. I stickblended to evenly disperse the titanium dioxide and then added my lye water. It didn't take long for the soap to reach trace, and once it did, I poured off 1 1/2 cups of soap, colored it with ultramarine pink oxide, and set it aside for later.
For my mica lines, I used some more of the Merlot sparkle mica. I poured about half of my white soap into my plastic loaf mold (which I had placed in the freezer beforehand) once the soap reached medium-thick trace. Then I used a tea strainer to tap out a line of mica that just barely covered the surface of the soap. (Too thick of a mica dusting may cause the soap to separate, so be careful not to overdo it. And remember to wipe the sides of your mold clean after dusting a mica line.) I had seen this video by Soaping101 and loved how Catherine made a double mica line in her soap. I wanted to try that, too. So I spooned some of my pink soap on top of the first mica line (being careful not to disturb it), keeping the pink soap on one side of the mold and reserving a small amount for later. Then I dusted a second mica line over just the pink soap, and then spooned the rest of my white soap on top of that. I drizzled the remaining pink soap on top of the white and texturized the tops. (To make texturizing easier, I popped the soap into the fridge for about 10-15 minutes to let it set up a bit.) Finally, I stuck my M&P heart embeds into the soap and then placed the mold in the freezer overnight.
I unmolded the soap the next day and let it sit for about four days before cutting it. The soap did sweat a little bit the first day or so due to condensation, but it dried out as it sat.
A couple of things to remember: Ungelled soap can zap for a few days longer than gelled soap because the saponification process is slowed. Ungelled soap can also be soft initially, too. When I cut the soap, it was still soft and my mica lines dragged a bit, even though I turned the soap onto its side to cut it. Fortunately, I was able to smooth away the mica smudges with my finger. A few days later, the bars were starting to harden up nicely.
The scent is lovely and perfect for Valentine's Day - a bit flowery, a bit bubbly. Definitely celebratory!
So happy Valentine's Day, everybody! I wish you all a lovely day of roses, champagne, and soap!
When autumn arrives, it seems like I've always got pumpkin on the brain. I want to bake pumpkin pie, pumpkin cake, pumpkin cookies. I want pumpkin bisque, pumpkin-scented lotions, pumpkin lip balm.
Pumpkin soap.
With the holidays approaching, I need some soap to gift. Everyone needs soap. Everyone loves soap. Not everyone loves pumpkin, but the good thing about soap is that you don't have to eat it. In fact, you definitely should not eat it. So, even if you don't like to eat pumpkin, you'll probably like pumpkin just fine in soap.
Hopefully, you'll like it better than fine. The natural sugars in pumpkin can help boost the lather, creating a luxurious bar. And if you also add something like goat's milk (which I did in this batch), the luxury factor goes into overdrive.
To make this soap, I used olive oil, coconut oil, sustainable palm oil, shea butter, and castor oil. For my liquid, I used part goat's milk (168g) - which I measured off and froze ahead of time - and part distilled water (121g). The original recipe called for 345g of liquid (for a full water amount), but you'll notice that my liquid adds up to 289g. Because I also added 56g of pumpkin puree, I subtracted that amount from my liquids. (I used the pumpkin puree at a rate of 1 ounce, or 28g, per pound of oils.)
I used canned pumpkin for my puree. (Make sure you read the ingredients label - you want 100% pure pumpkin, not pumpkin pie filling, which has added spices and sugar.) Because I was using only 2 ounces total, I had some left over. Unless you're making a fifteen-pound batch (or using a lot more pumpkin than I did), you'll probably have some extra, too. You can freeze the leftover pumpkin for later. Or you can make Pumpkin Molasses Cookies, which is what I did.
Goat's milk is a wonderful additive in soap - it feels so creamy and the sugars in it also boost the lather. It's a good idea to freeze the goat's milk ahead of time and to soap cool so that the sugars in the milk don't scorch. I like to stir my lye solution in an ice bath to keep the temps low. The thing about goat's milk is that it can smell a little funky when the lye hits it. I've heard it described as an ammonia-type smell, but I think it sorta smells like goat cheese. Many folks find the smell unpleasant (I didn't mind too much since I absolutely adore goat's cheese), but not to worry - the smell disappears within a few days and shouldn't affect the scent of the final soap.
For the scent, I used a Sweet Pumpkin fragrance oil from Elements Bath and Body. This is my favorite pumpkin scent out of all of the pumpkin FOs I have tried so far. It is more sweet than spicy, which is why I like it so much. See, my nose is weird. I have a difficult time detecting spice notes like cinnamon, clove, nutmeg, etc. A lot of times I can't really smell pumpkin-scented candles. I once had a pumpkin and spice FO that I couldn't smell at all. Thinking that maybe the fragrance was defective, I had my friend sniff the bottle and he said, "What?! You can't smell that? It's so strong!" Funny thing is, my dad is kinda the same way. I dragged him into a Yankee Candle once and made him smell everything and he and I had trouble with a lot of the same scents. Genetics, I guess. DNA is weird wacky stuff.
Anyway, I really like this fragrance oil and everyone else seemed to like it, too, when I used it last year. The vanilla in the fragrance oil does discolor the soap, though, so it is necessary to plan accordingly. My soap went from a carrot-orange color to a dark but lovely brown.
Somewhere along the line, I saw this blog post by Amy from Great Cakes Soapworks. She uses a rubber stamp dipped in mica to embellish her soap bars. I loved this idea, and thought it was an easy way to add some pizzazz to my bars. Amy even made a YouTube video showing how she stamps the soap, and I used her method. (A big thank you to Amy for sharing her technique!) I didn't realize until I watched the video again that she and I had made very similar soaps. We both used pumpkin puree and goat's milk in our batches. When I went to make my pumpkin soap, I remembered that I had some goat's milk in the freezer and thought, Wouldn't that make this soap even nicer?
The soap about halfway through gel phase
Whether or not to gel soap is a personal choice. Lots of soapers choose to avoid gel phase so that the color remains lighter and the texture is a bit creamier. To avoid gel phase, pop the soap into the fridge or even the freezer (particularly if you're working with super-heater ingredients like milk, beer, honey, etc.). I decided to gel my soap because I like gelling my soaps. Plus, since the fragrance oil discolors the soap dark brown, I wasn't concerned about trying to keep the colors lighter.
I used my wooden log mold for this soap, and it turns out that I really didn't need to insulate this batch. With the combination of pumpkin puree, goat's milk, and the spice notes in the fragrance oil, the soap went into gel phase almost immediately. Fortunately, I was peeking at my soap and saw it going into gel phase, so I was able to take the top of the mold and the towels off before the soap overheated or cracked. (My textured tops kinda flopped, though.)
When it was time to cut the soap a couple of days later, I dipped my pumpkin stamp into some of Bramble Berry's Gold Sparkle Mica and then pressed it lightly but firmly into my fresh-cut soap. (It's important that the soap has been cut just before you do the stamping so that the mica will stick to it.)
I had some Goldilocks moments: The first try, I didn't use enough mica. The second try, I used too much. But the third try was juuuuuuust right. I discovered that it is best to get a bunch of mica onto the stamp and then tap the stamp against the countertop to get rid of the excess mica. After I cracked that code, stamping was much smoother and more uniform.
Here is a video showing how I made and stamped my Sweet Pumpkin soap:
How to clean the stamp when you're done? Get a toothbrush (new and unused, of course) and scrub the stamp under running water.
I bought a bunch of stamps. There was nothing I could do to stop this.
The stamping looks great, and I'm so glad to have a fun, easy way to adorn my soaps. I was so inspired, I raided the stamps in the dollar bin at my local craft store and bought a bunch. At that price, I couldn't afford not to! My Christmas soaps are made for this year, but next year I will have some cute holiday options!
Oh, and hey, don't forget - it's still November, so that means that it is Givember time at Bramble Berry! A few weeks ago, the lovely folks at Bramble Berry sent me some supplies to try (you can read more about that here) and offered a very special treat to my blog readers. Here's how it works: Any Bramble Berryorder placed during the month of November that includes the code GIVEMBER50 will get you entered into a drawing for a $50 Bramble Berry gift certificate. This code only applies to orders placed during November - don't forget to include the code during checkout! Happy shopping, and best of luck to you all in the drawing!
Also, Thanksgiving is next Thursday and I want to wish all of you who are celebrating the holiday a very happy Thanksgiving!
As I've mentioned before, I have too many fragrance and essential oils. But I keep buying more. You know how it is - you need some lye and maybe some soapmaking oils and you think, "Well, since I'm putting in an order, I may as well get some more of Fragrance X and ooh, look, I've been wanting to try Fragrance Y, and one of my buddies said that Fragrance Z was uhmazing ..."
And the next thing you know, you have half a dozen fragrance oils in your shopping cart, and that's if you're displaying any kind of restraint.
And that is how I came to acquire some of Bramble Berry's Tomato Leaf fragrance oil a couple of months ago. (Along with a few other fragrance oils, too, of course.) I had heard so many great things about it, and with spring nearly gone and summer approaching, I was in the mood to try something garden-y. And I figured I had better get around to soaping with it soon before autumn and Christmas make me forget all about Tomato Leaf until next year.
Mind you, I am not a gardener, but the idea of having a garden appeals to me very much. I might consider having a garden if I didn't have an enormous talent for immediately killing any and all forms of plant life. I am truly impressive when it comes to swiftly murdering plants. Gifted, really. I'm not bragging. I always feel terrible whenever a plant expires under my "care," and it always does, even when I try really hard to keep it alive. I even somehow managed to dispatch not one but two cactus plants to their untimely deaths.
Really. I don't know how either.
With that kind of track record, I don't think I can be trusted with even a window box herb garden. The poor thing would be doomed.
Also, I would have to get over my inability to tolerate heat in order to be a gardener. I hate being hot. And I would also need a yard for a proper garden, and I don't like yard work.
A garden actually sounds like a terrible idea for someone like me. I think I'll stick to soap.
Burgundy and green oxides, mixed with a bit of glycerin
When I first sniffed the Tomato Leaf fragrance oil, I was transported back to my grandmother's little tomato and green bean garden that ran alongside her house. The fragrance oil smelled just like I remember the tops of the tomatoes smelling right after we snapped them from the vine. Very green and herbaceous. I immediately thought that I wanted to do a red and green layered soap with a gold mica line running between the two layers.
I added my fragrance oil to the cooled base oils before adding the lye solution and then split the batch after reaching trace. I poured off one-third of the batter into another bowl, leaving two-thirds behind in my original bowl. Then I added the burgundy oxide to the two-thirds portion, and the green to the bowl with one-third of the soap. The goal was to make the soap look sorta like a tomato - well, a rectangular tomato, I guess - with most of it being red with a bit of green on top to represent the leaves. I figured the mica line would add some interest and contrast.
To build the layers, I poured the burgundy soap at a medium-thick trace, dusted the red layer with the gold mica (using a tea strainer), and then poured the green soap at thick trace over the back of a spoon to cover the mica line. (Tip: Wipe your mold clean after pouring the first layer of soap, and wipe it clean again after dusting the mica line so you don't have any errant soap or mica all over the sides of your bars.)
Here's a video I made of the process. I also share a little trick for cutting the soap so that the mica line doesn't drag down through the bars - cut the soap on its side! (This trick also works great if you have herbs, oats, seeds, or any other sort of additives on the tops of your bars):
Overall, I am very pleased with how this soap turned out. I was trying to get some texture on top of the red layer so that my mica line would be a bit uneven. I like how the line is a little crooked, but I think I could have gotten a more interesting line if my soap had been brought to a thicker trace. I like the texture that my mini whisk gave the top of the green layer - it looks almost like the veins that run through leaves!
In the finished bars, the Tomato Leaf fragrance is a soft, delicate leafy scent with a touch of sweetness. It would be lovely in a gardener's cornmeal
scrub soap, too. Or maybe a soap made with tomato juice or puree.
What are some of your favorite spring and summer soap scents?
If you are a soap connoisseur (and I am assuming that you are), then you may have seen or made a "pencil line" in a bar of soap.
I was new to all of this pencil line stuff until recently. I had seen it done, but had never tried it myself. What is a "pencil line"? See the thin brown line between the two layers of my soap? That's a pencil line. Such lines are made by dusting a layer of mica, cocoa powder, poppy seeds, ground spices, ground coffee, charcoal powder, etc., in between soap pours. When the bars are cut, the line runs through the width of the soap, looking like it was drawn with a pencil.
One of my mom's favorite soaps is scented with a blend of eucalyptus and clove essential oils. When my folks came to visit last month, I gave her the last of my Eucalyptus Clove soap. Knowing how much she likes it, I made some more since I was plumb out. I figured it would also be a good time to try out the pencil line.
Because this was my first time playing with this technique, I kept things simple and did not color my soap or try to do anything too artsy so I could focus just on the pencil line. I thought about using ground cloves for my line, but decided against it, worried that it might be too scratchy or possibly a skin irritant. So I used some Cappuccino mica instead.
I made my batch of soap as usual and brought it to a medium-thick trace. I poured about half of the soap into my mold and then scooped a bit of mica into a tea infuser. (Any small sieve will also work.) To make the pencil line, I gently tapped the side of the infuser while moving it over the soap, creating a thin layer of mica. (Take care not to make too thick of a layer - the soap can separate if too much mica or powder is used. You just want to barely cover the surface of the soap.)
Dusting soap layer with mica (l); soap with a thin layer of mica (r)
After tapping out a layer of mica, the sides of my mold were sullied. I wiped the inside of my liner with a paper towel to clean it up. Otherwise, I would have ended up with splotches of mica all over the outside of my soap when I poured the next layer.
Wiping mold clean
(You probably noticed that I'm not wearing my safety gloves in the photos above. I confess that I did take my gloves off to tap out the mica line and to wipe my mold clean - I needed precision for those parts of the task, and my gloves give me big clumsy oaf hands. After I was done wiping my liner clean, my gloves went right back on.)
By the time I was done fooling around with the mica, the remaining soap in my mixing bowl had set up quite a bit and was thick. The first layer was poured at a fairly heavy trace, so I felt confident it could support the next layer. I poured the second layer over the back of a spoon so that the soap wouldn't break through the first layer, disturbing my mica line.
Pouring the rest of the soap over the back of a spoon
When I was done pouring, I tapped the mold on the countertop a few times to work out any air bubbles, covered the top of the soap with cling wrap to prevent ash, and insulated the mold so the soap could gel.
A few days later, it was time to cut. Here's a tip for cutting soaps with a pencil line - turn the soap onto its side and then cut it. If you cut top-to-bottom, you'll drag your line through the soap. Cutting the soap on its side keeps the line nice and crisp. And also wipe your blade clean after every cut. (This tip also works if you've got something like calendula, oatmeal, seeds, jojoba beads or whatever sprinkled on top of your soap. Ever cut your soap and had the stuff on your decorated tops drag through the soap, making grooves? Try the side-cut to avoid that.)
Cutting proved trickier than I was expecting. My soap mold has handy-dandy cutting notches built into it so I can make standard cuts, but my soap was too tall to fit inside my mold on its side. Lining up my cutter with the grooves from high up was imprecise, and because my cutter has a thick wooden handle, it wouldn't cut all the way through the soap anyway.
So, I took the soap out of the mold so I could line it up with the edge of the mold and the cutting notches. I used my cutter to mark where to cut and then did my best to make a straight slice with a chef's knife. I am the worst at freehand cutting, but I did okay with my notches marked off. The bars aren't as uniform as I would like, but they're not bad.
And how thrilled was I that the soap didn't separate when I cut it? Very, that's how. I worried I was a bit heavy-handed with the mica in parts, but I guess I did all right.
The pencil line technique is definitely something I want to play with again. I want to experiment with bringing the line higher up the soap. And while I like how straight my line turned out, I rather enjoy some of the soaps I've seen with imperfect pencil lines - lines that slope a bit or have a couple of small ridges in them. Perhaps I need to work some texture into the soap layer before dusting the line to achieve that effect.
Do you like pencil lines? Ever made one? What are some of your tips? Do you like perfectly straight lines, or do you like lines with a bit more character?

 Almost a year and a half ago, I made my first batch of Castile soap. Traditionally, Castile is made with only one oil - olive. Just olive oil, lye, and water. This simple recipe creates a creamy, luxurious bar of soap.
.jpg)